On this day 100 years ago (26th April 1918) my Grandfather, Harold Faulder, climbed out of a trench near Ypres leading his company across no man’s land towards the German lines. He did not return and his body was never recovered.
A previous post had detailed his career. Today I am looking at what we know about the night of 25th/26th April and the early morning of 26th April 1918.
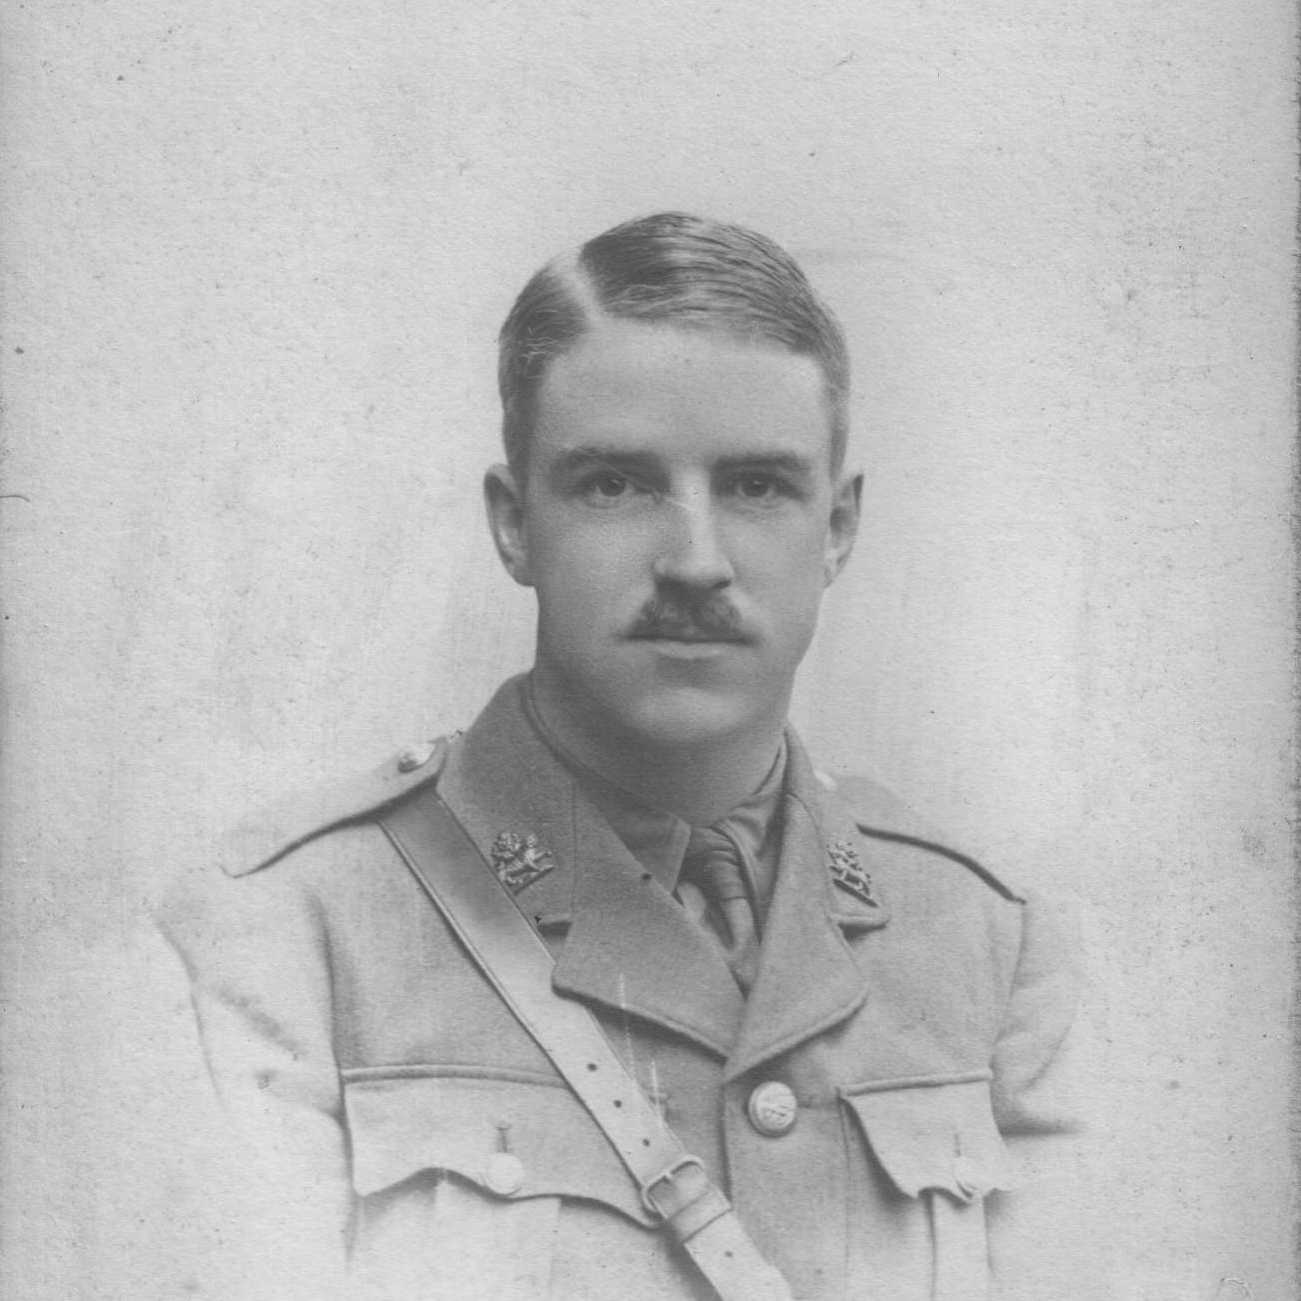
Harold Faulder, T/Capt, 3rd Battalion York and Lancaster Regiment (attached to 1/4th Y&L in late April 1918)
Since I wrote the previous post, I have found a letter sent to my Grandmother after my Grandfather’s death by Captain Leslie William Johnson M.C.. I already had a letter to my Grandmother from Lt-Col Sidney Clifford Brierly DSO (who it is believed was with the 1/4th KOYLI – which together with 1/4th and 1/5th York and Lancaster Regiment formed the 148th Brigade). Together with the battalion and brigade war diaries, we can piece together a bit more detail about what happened that morning 100 years ago – and make marginal corrections to my earlier post.
The Place
We tend to think of the Western Front as being some distance away. In fact it is quite close and a relatively small area.
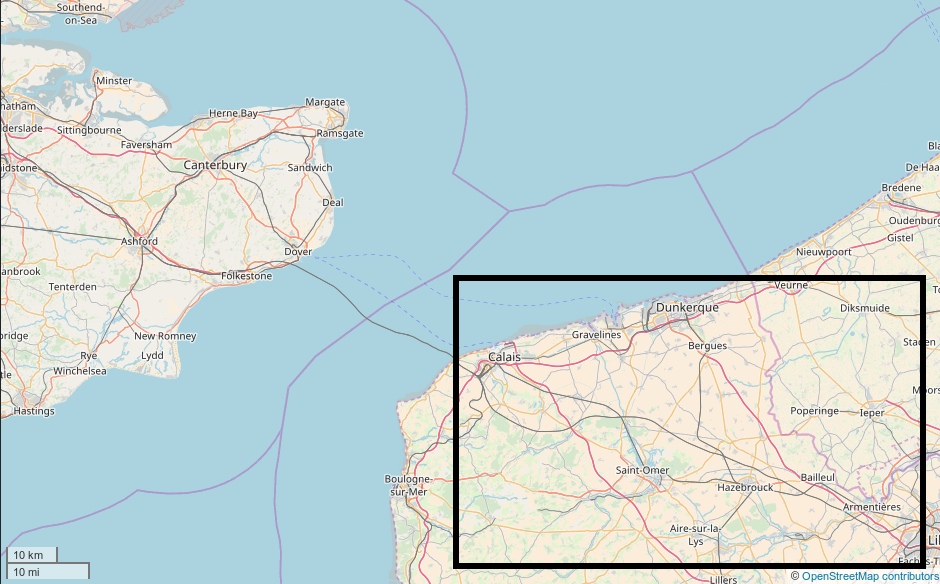
Relationship of Flanders to the UK
The Flanders part of the Western Front is about the same size as East Kent and is approximately represented by the eastern half of the outline in the map above – which also indicates the area covered by the next map.
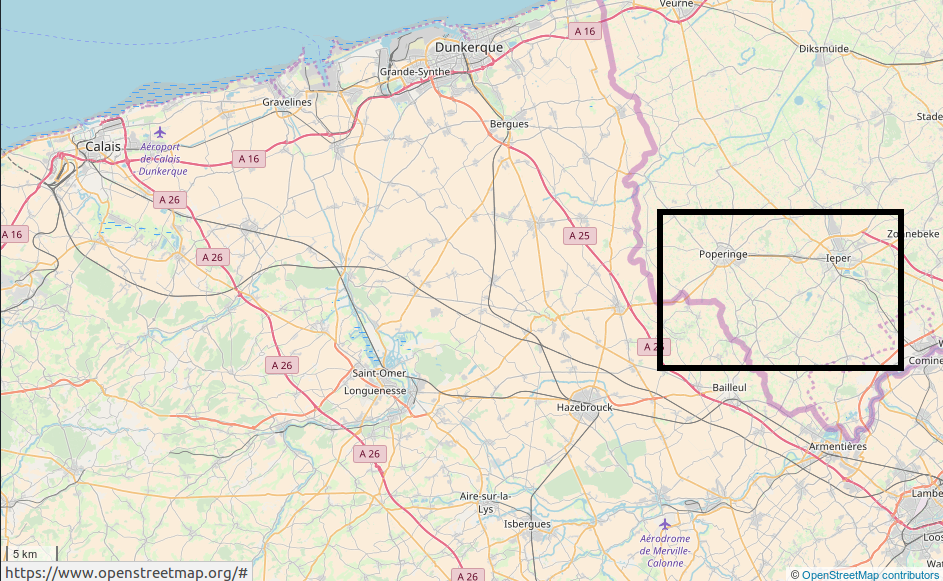
Relationship of Ypres to the Channel Coast
Ypres (official spelling Ieper) was seen as strategic because if the Germans (attacking East to West) could over-run Ypres they could rapidly capture the Channel Ports. Even in the First World War it was appreciated that Dunkirk was important for both supplying and evacuating British Troops. In addition Hazebrouck (in French Flanders) was (and is) a major railway junction.
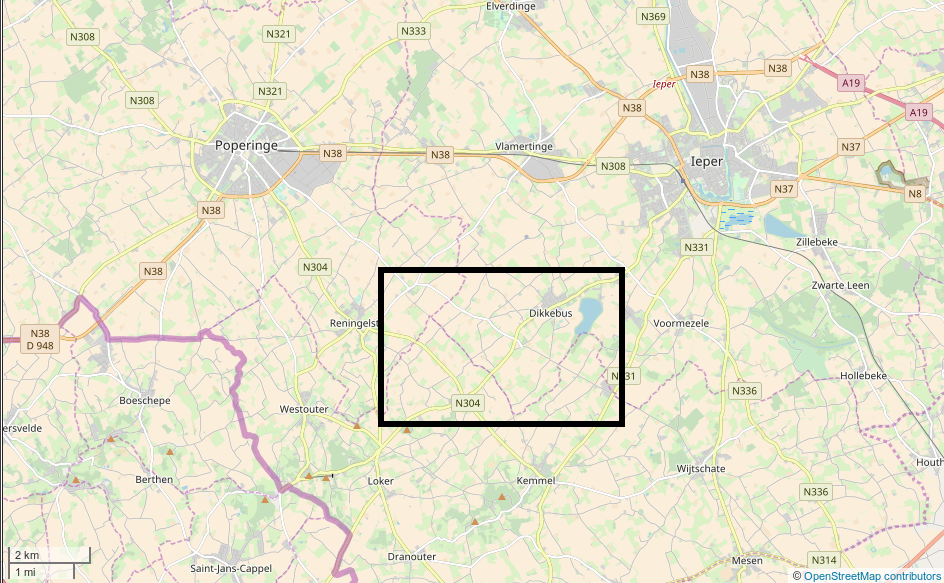
Poperinge – Ypres – Wijtschate Area
The 1/4th battalion York and Lancaster Regiment (1/4th Y&L) had been in camp at Brandhoek (between Poperinge and Vlamertinge) on 21st April where they had been inspected by M Clemenceau, Prime Minister of France. Harold Faulder joined the battalion the following day as part of a draft of six officers to replace losses in the previous weeks.
The map above shows the relationship of Poperinge and Ypres and running south of Ypres, the Messines Ridge (official spelling Mesen) – the scene of fierce fighting particularly in 1917.
The War Diary of the 148th Brigade records:
2pm 25th April Brigade moved by route march to the vicinity of OUDERDOM and assembled in trenches. … The Brigade were to be prepared either to strengthen the line or to take part in counter attack.
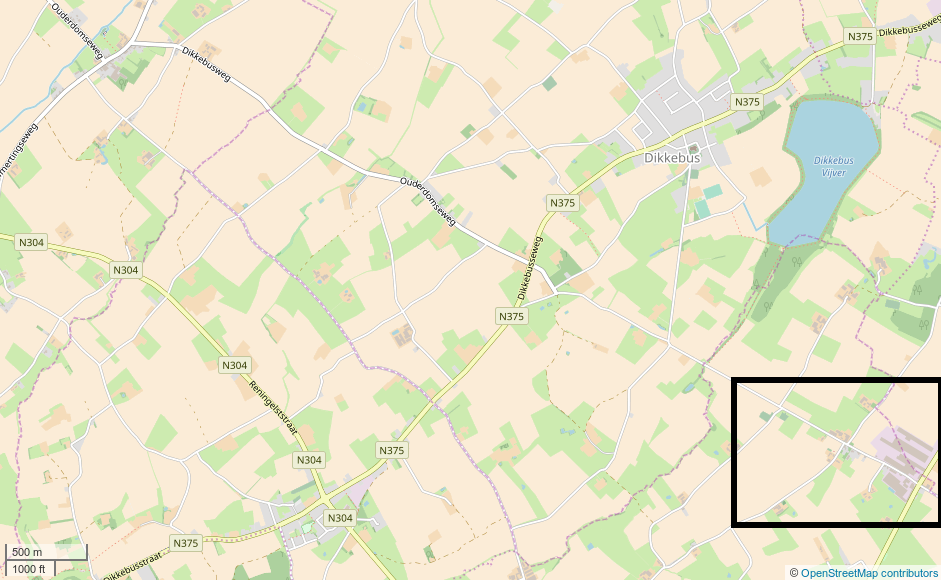
Vierstraat & North Western Neighbourhood
Ouderdom is the settlement in the North West corner of the map above (at the junction of Ouderdomsweg and Vlamertingseweg) – 5 to 7 km from the settlement of Vierstraat (and about half-way between Brandhoek and Vierstraat).
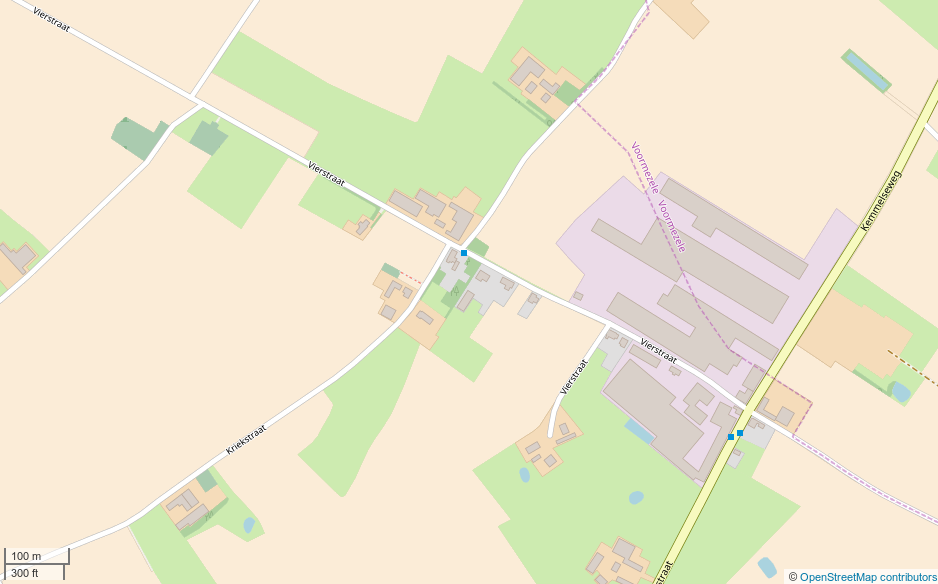
The battlefield West of Vierstraat
The actual battleground was to the West of the settlement of Vierstraat on the right hand side of the Vierstraat (road) as you approached up the rise towards Kriekstraat just short of Vierstraat.
Locally the Germans were attacking in a West North Westerly direction (roughly parallel to the Vierstraat). They had advanced from capturing the Messines Ridge and it would seem that the the bulk of the enemy was close to the Vierstraat – La Polka road (the yellow road “Kemmelseweg” / “Kemmelstraat” on the above map).
A map in the War Diary for the 148th Brigade shows the positions taken up by the battalions that formed the brigade on the night of 25th April 1918.
.png)
Extract from Map in 148th Brigade War Diary – 25th April 1918 WO 95/2804 The National Archives, London, © Crown Copyright (Licence 9155)
The reserve trench (occupied by the 1/4th KOYLI – King’s Own Yorkshire Light Infantry – green tint above) seems to run along the present day Molenstraat. The 1/4th and 1/5th Y&L (red and blue tints above) are alongside each other in a front-line trench (referred to as “The Blue Line”) a little more than half way between Molenstraat and Kriekstraat. The two roads are about 450m apart, so the front line trench was no more than 300 metres from Kriekstraat (British contemporary name “Cheapside”).
The 1/4th Battalion York & Lancaster Regiment War Diary records:
12:30am 26th April
Orders received for Bdg to move forward and take over a portion of the FRONT LINE (CHEEPSIDE LINE) between left flank of 9th KOYLI (64th I.B.) about N15 b9.9 and the HALLE BASS – VIERSTRAAT Rd. The Battn took over the “BLUE LINE” from the VIERSTRAAT Rd N10 b4.7 to N10 a9.1. HQ was established in a dugout at N10 a9.9.
5th Y&L Rgmt were on our right and XXII Corps Mounted Troops on our left. The move was completed about 3.30am.
Superimposing the trench map on a modern aerial view of the area it is possible to see that the 1/4th’s trench (red line) closely followed field boundaries that still exist.
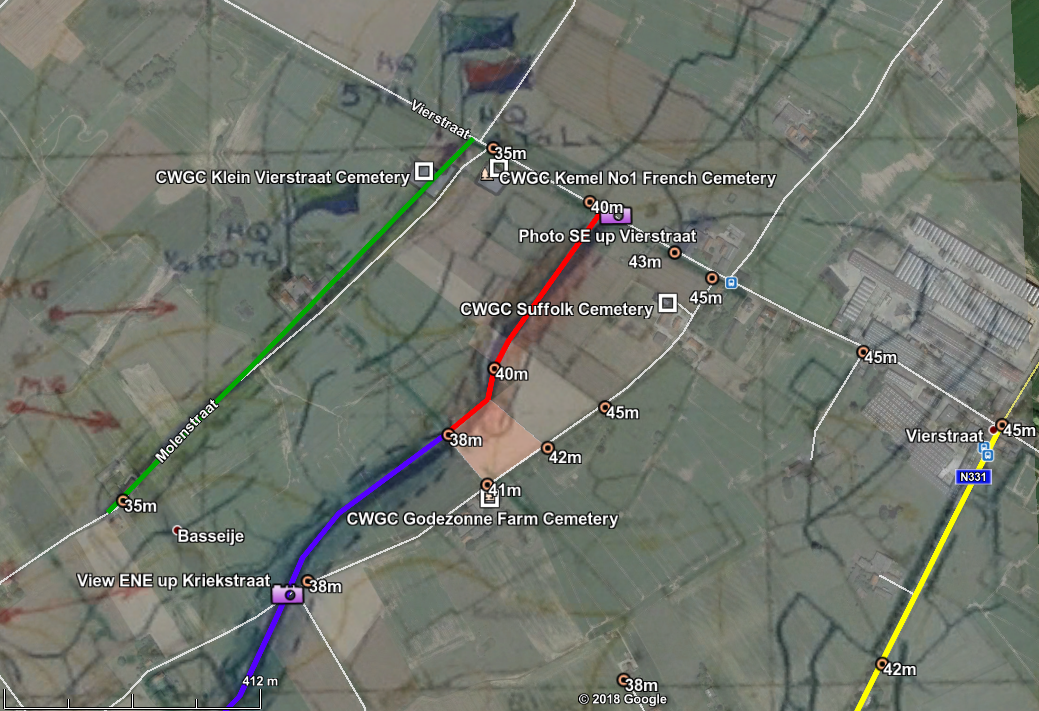
Modern aerial view of Vierstraat with Trench Map of 25 April 1918 Overlaid. Trench Map © Crown Copyright (Permission 9155). Aerial View © Google Earth
The land here has a gentle rise from the British trenches towards Vierstraat – that is the Germans occupied the higher ground. The top of this rise is about 45 metres above sea-level whilst the British Front line was about 39/40 metres above sea-level.The map above has two camera icons indicating where the views below originated.
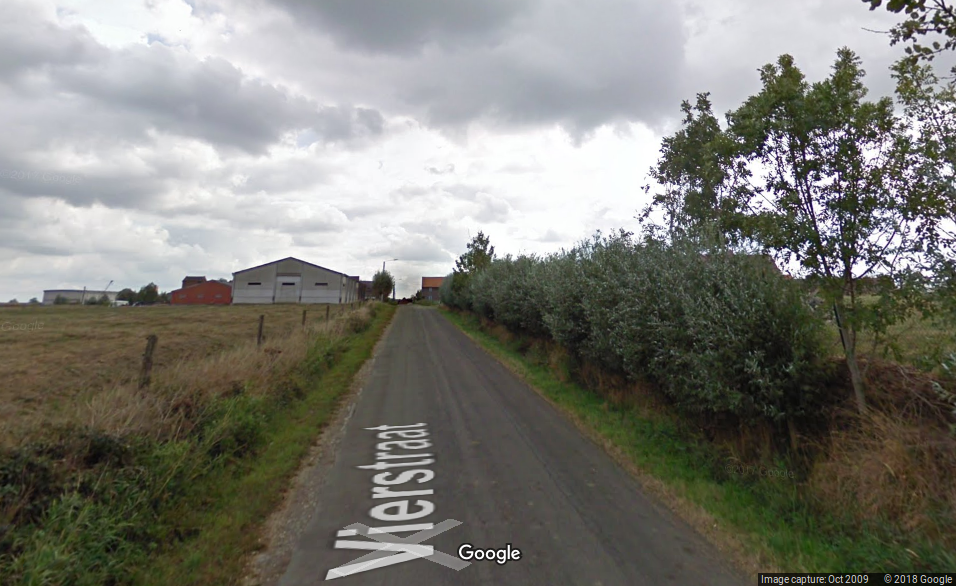
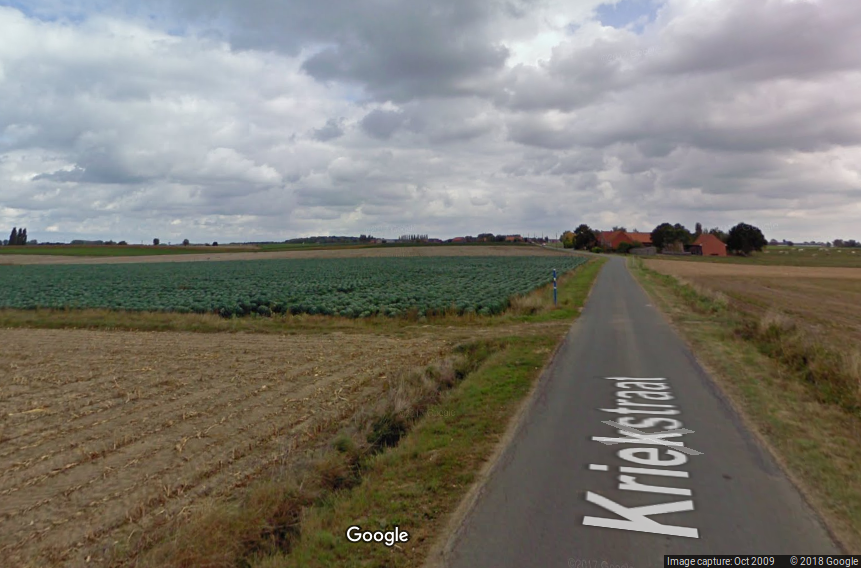
Modern day view up Vierstraat (towards SSW) © Google Streetview
The above view is taken from close to where the front-line trench (The “Blue Line”) intercepted the road. The part occupied by the 1/4th Y&L is to the right of where this view was taken.
The buildings in the picture above represent where the ground starts to level out just short of Kriekstraat. German soldiers on Kriekstraat (Cheapside Road) would not have had a clear line of sight of soldiers in most of the York and Lancaster’s front-line trench. Likewise British troops in their trenches would have been unaware of German soldiers on the Cheapside Road.
View ENE up Kriekstraat (Cheapside Road) towards Vierstraat, © Google Streetview
The above view is looking along Kriekstraat (Cheapside Road) towards Vierstraat from the approximate place where the 1/5th Y&L battalion’s trench intercepted the road. The trees on the extreme left of the picture are at the back of the CWGC Klein Vierstraat Cemetery on Molenstraat (the road where the the 1/4 KOYLI were in a reserve trench). The buildings further up the road are Godezonne Farm; following the field boundary opposite the farm to the left and down the slope takes you to approximately where the occupation of the front-line trench changed from the 1/4 Y&L to the 1/5th Y&L.
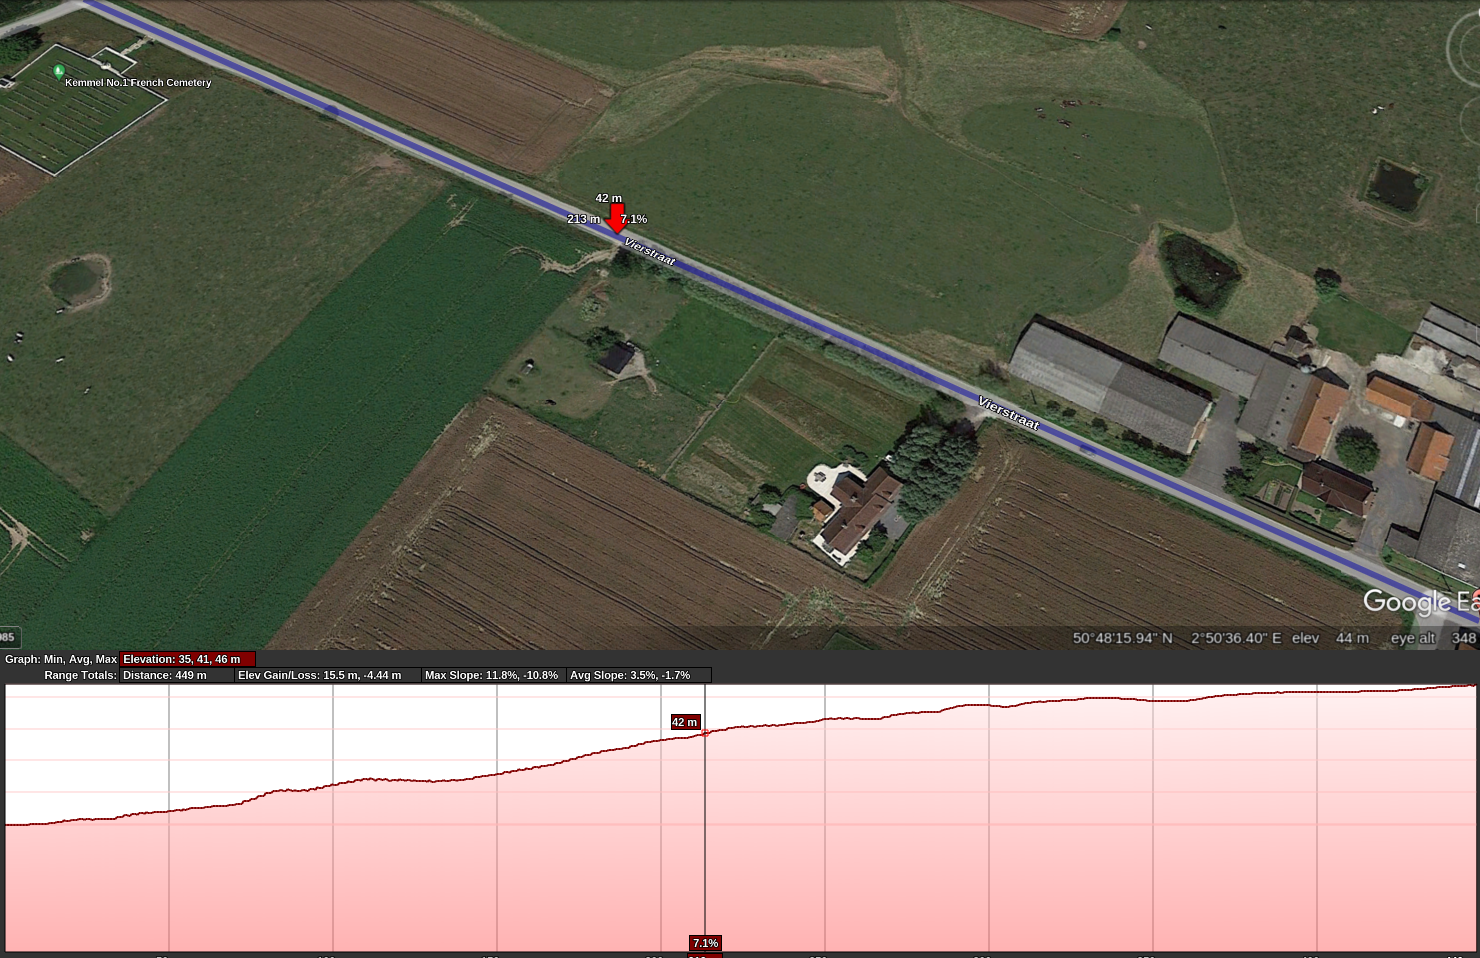
Elevation – Vierstraat Road between junction with Molenstraat (left) and junction with Kriekstraat (right) © Google
The elevation view above (heights exaggerated) just about corresponds to the horizon to the left of the Kriekstraat in the previous view along that road. The red arrow in the aerial view marks the approximate intersection of the 1/4th Y&L trench and the Vierstraat.
It is not clear from sources the exact formation taken up by the 1/4th, but it is probable that all 4 companies were in the trench. The battalion war diary gives no indication that they advanced in phases (two companies followed closely by the other two); it is possible that all four companies attacked together. Normally A Company would be on the right (facing the direction of attack) and D company on the left.
From a letter written later by H C Calvert (Harold Faulder’s executor) to the War Office it would appear that Harold Faulder was commanding A Company. The letter does not refer to commanding a company but commanding “A” Coy.
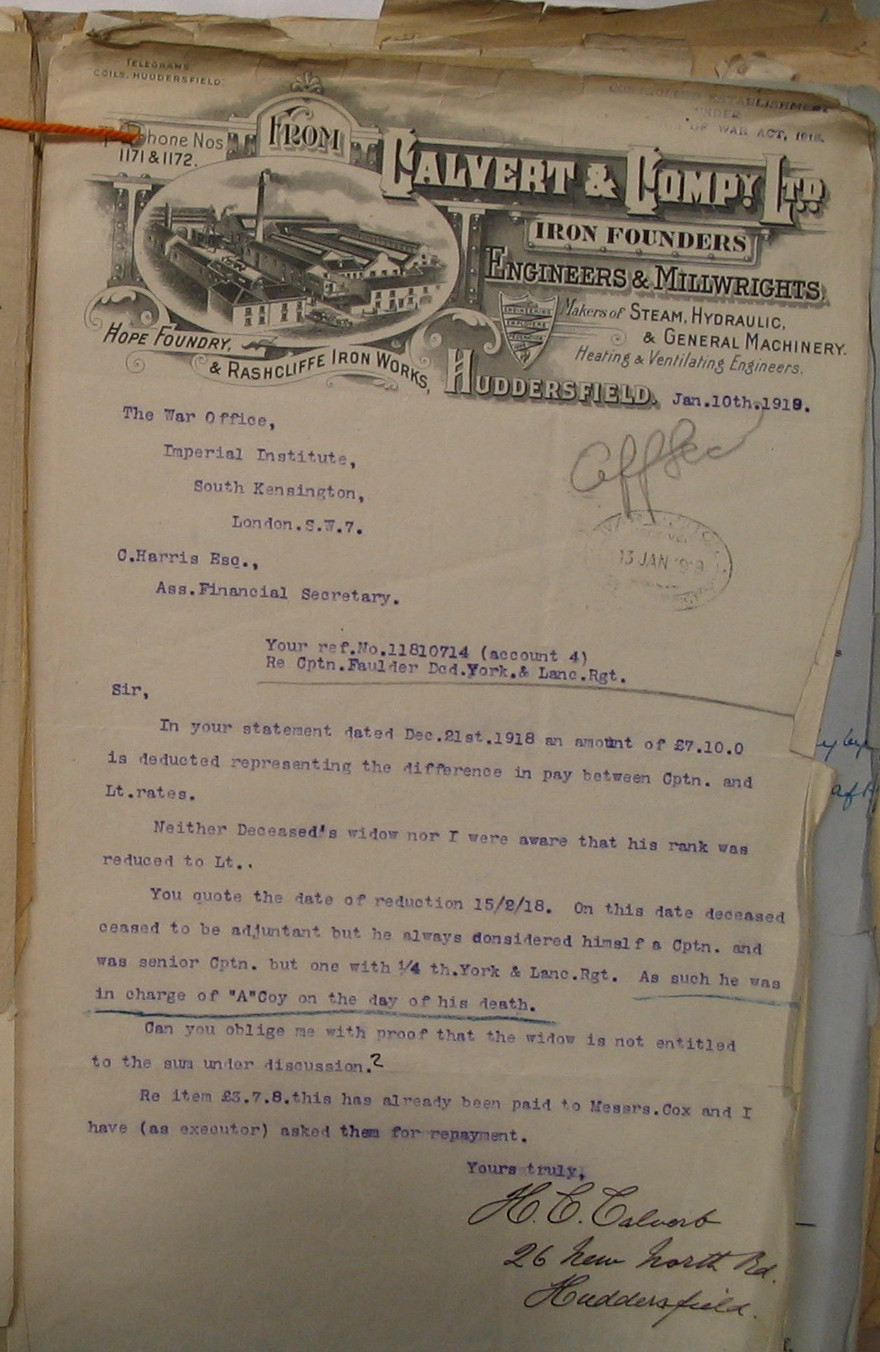
Letter from H.C. Calvert to War Office regarding Harold Faulder’s role and rank on the day of his death. From Service File at The National Archives, WO339/48300 © Crown Copyright (Permission 9155)
No correspondence from the War Office in the Service File disputes that he was in command of “A” Company – and there is explicit acknowledgement that he was in command of a company. The War Diary records that three company commanders were killed in the attack; Captain Faulder was the most senior casualty; it is therefore possible (despite only recently joining the battalion) that he commanded the “senior” company – which would normally be on the right flank. Captain Unsworth was probably the most senior captain; at the time he was second in command of the battalion – and therefore probably at battalion HQ.
It is probable therefore that Captain Faulder was in the centre of his company which occupied the right-hand quarter of the battalion’s line just before the attack.
Time-line
| Date 1918 | Time | Detail |
|---|---|---|
| 22 April | Ridge Camp Branhoek: Capt R E Wilson recalled to take command as Lt Col. Capt Unsworth 2 i/c Draft of 6 Officers including H Faulder | |
| 24 April | Training and reorganising companies | |
| 25 April | 03:15 | Ready to move at 30min notice |
| 13:00 | March to Ouderdom (about 5km by road) | |
| 26 April | 00:30 | Move to Front Line (about 5km) |
| 03:30 | In Front-line Trench [Blue line] | |
| 04:25 | Attack Launched | |
| later in morning hour in afternoon | Shelled by Germans | |
| Dusk | Took over part of 1/5 Y&L line | |
| 27 April | 04:45 | Shelled by Germans |
| Dusk | Shelled by Germans | |
| Evening | Relieved by 2nd Royal Scots In Support 500yds behind front line; HQ at Bloody Farm | |
| 28 April | Dusk | Shelled by Germans |
| 29 April | 05:30 | Germans attack after bombardment |
| 30 April | night | Relieved by 9th Loyal North Lancs |
| 1 May | 01:30 | Marched to Reninghelst (about 8km by road) |
The British Attack
The attack was short, unsuccessful and costly. The objective was to move forward from the front line trench – occupied by the 1/4th Y&L (in red below) and the 1/5th Y&L (in blue) – and referred to as the “Blue Line” in the War Diaries and to take the Vierstraat to La Polka line (the Yellow line in the map below). This was to be done under a protective barrage.
The 148th Brigade War Diary stated that this barrage would start at 4.25 coming down 250yds in front of the Cheapside Line and moving forward 100 yards every 4 minutes. “250 yards in front of the Cheapside Line” must mean to the South East of the Cheapside road (running NE-SW diagonally across the map below) – the other interpretation would have the barrage falling on the British front line trench.
Modern aerial view of Vierstraat with Trench Map of 25 April 1918 Overlaid. Trench Map © Crown Copyright (Permission 9155)
The Battalion War Diary of 1/4th Y&L (WO95/2805/190) reports:
4.25am
The attack took place. The barrage which was to fall 250 yds in front of the BLUE LINE was absolutely inadequate and 5 or 6 German machine guns which had been pushed forward onto the CHEEPSIDE Rd (running from N10 b 8.5 to N10 b 0.2 **) were quite untouched. There was fortunately a heavy mist which covered the beginning of our advance but as soon as the movement was noticed the machine guns on the CHEEPSIDE Rd opened fire and rendered further advance impossible. The Battn was forced to withdraw to the BLUE LINE having lost several officers, including three Company Commanders, and about a third of its strength in casualties.
One of those company commanders was T/Capt Harold Faulder.
It is notable that the battalion diary thought the barrage was to fall 250 yards in front of the Blue Line (the front line trenches); this would mean that the Cheapside road (where the German machine gunners were) would have been shelled. Yet the brigade diary referred to the barrage being 250yards in front of the Cheapside Line.
The map references to machine guns on the Cheepside Road is to that part of the road on top of the rise (marked in the above map by the two 45m spot heights on Kriekstraat – the local offical name for Cheapside Road). It might be concluded that they were not on the part of the road dropping down towards the 1/5th Y&L trench (marked in Blue above). Therefore the machine guns could have fired directly at where I have supposed companies C and D were advancing; they would have been able to fire obliquely at where I have supposed companies A and B were advancing.
The Battalion Ward Diary of 1/5th Y&L (WO/95/2805/135) reports:
4.25am
Batt advanced in conjunction with troops on both flanks to reach trench line near Vierstraat – Kemmel RD but after two hours fighting was forced to withdraw to original line owing to strength of enemy and weakness of our artillery barrage.
Grant’s 1/4th battalion history was a little less restrained (my italics):
At 4-25 a.m. the attack took place. Orders stated that we should meet with no opposition short of our objective, and the artillery programme was based on this assumption. The “barrage” proved to be ludicrously inadequate, and was indeed almost unnoticed. Fortunately, there was a heavy mist, which covered the beginning of our advance, but very soon we encountered a line of machine guns (well on our side of the barrage) which poured out such an annihilating fire that it was impossible to continue the attack, and we were forced to withdraw to our original line. In this short operation we lost seven officers and ninety-one men.
It would seem that there were two factors that meant the attack failed. The Germans had moved machine guns well forward undetected by the British and the British artillery barrage did not shell these positions.
The 1/4th casualties in this two hour action were 7 Officers (4 killed, 1 missing, 2 wounded) and 91 Other Ranks (17 killed, 9 missing, 65 wounded).
By comparison the 1/5th alongside lost 5 officers (2 killed, 3 wounded) and 70 Other Ranks (8 killed, 5 missing and 57 wounded). In its diary it stated its strength before the attack as a mere 280 men covering a frontage of 500 yards.
A battalion’s “establishment” would normally have been about 1000 officers and men; 98 casualties was, according to the 1/4th War Diary (above), “about a third of its strength” – which would imply a strength of about 300 – roughly comparable to its sister battalion. This would be a reflection of the brutal fighting that the battalion had been involved in earlier in the month. (This was during the period of Haig’s “backs to the wall” General Order.) However, the end of the month’s War Diary has a table of battalion strengths. For 26 April the strength of the 1/4th battalion was reported as 24 officers and 583 other ranks – which would seem to be in conflict with the “about a third of its strength” comment.
Given these reports it is highly unlikely that the 1/4th got beyond the Cheapside Road. Therefore “A” Company is likely to have done all its fighting in the area shaded orange in the map above. This area is just over a hectare in size – a little larger than an International Rugby pitch.
This area – expressed as a diamond with North, East, South and West corners – has trench map coordinates of approximately N.10.b.0.1, N.10.c.2.9, N.10.c.0.7, N.10.d.8.9; that is almost bang in the centre of square 28.N.10.
My previous note had reported Clifford Brierly’s letter to my grandmother which included:
I also met a L/Cpl Horne, who was formerly with him in the 14 th Y+L, + was near him when he was hit on the 26 th . He was going forward with his Company in an attack, + had just told this man to watch a German M.G., when he was hit by a bullet + killed immediately.
Leslie Johnson’s letter gave more detail. (I am still trying to obtain copyright permission to directly quote from it). He describes how Captain Faulder’s company was initially advancing through an area of huts but once they got onto flat ground beyond that area they came under heavy fire and most of the NCOs and Officers were casualties leaving Capt. Faulder to lead a small rump of soldiers onwards. He also reports that he received a bullet in the head which killed him immediately.
The reference to huts raises a slight doubt about the assumption that Harold Faulder was on the right of the 1/4th line. Even though the huts are not shown on the trench maps referenced so far, a trench map dated May 1918 does show some huts, but on the left of the line in front of where I had assumed “C” and “D” Companies would have been. However there may have been huts on the right but by May 1918 they may have been consciously removed or destroyed by artillery fire. No huts are shown in front of any of the battalion’s future line on a map dated 8 April 1918 – but that could be because the cartographer chose not to mark them. Other maps do not show the huts – either they were temporary features or cartographers chose not to include them.
The Body
Clifford Brierly’s letter had referred to the battalion being unable to bring Harold Faulder’s body back due to having retire back to their original line.
Leslie Johnson’s letter gives details of efforts to recover the body – both driven back by German fire. Capt. Johnson was not present during the attack but he reports that he had spoken to some of the survivors. In the early morning after the attack stretcher bearers had gone out but when they got to the flat area beyond the huts they were driven back. Later two “picked men” (who Johnson knew because they had served in his company in the 14th Y&L – which means they would probably have known Captain Faulder) made another attempt but were again driven back. It was hoped that a third attempt could be made after dark, but by then the enemy had advanced and occupied the area. He expressed the hope that they gave the body “proper burial”.
Previously I had accepted that given the German bombardment following the attack, it was quite possible that the body would have been either destroyed or buried/covered by the results of artillery fire. If the report that the area was occupied shortly after the attack is accurate, this is less likely and it is more probable that the Germans would either have swiftly buried the body in a convenient shell hole (for reasons of hygiene) or that they would have removed the body for more formal burial. The 148th Brigade Diary reports British harassing fire to prevent enemy relief, so it is possible that British Artillery fire may have destroyed or buried/covered the body.
After the war there was a concerted effort to recover bodies from this battlefield. Whilst a number were recovered, Harold Faulder’s body was never identified. It is therefore either still out there, or buried (probably in one of the nearby cemeteries) as a “Soldier of the Great War; known unto God”.
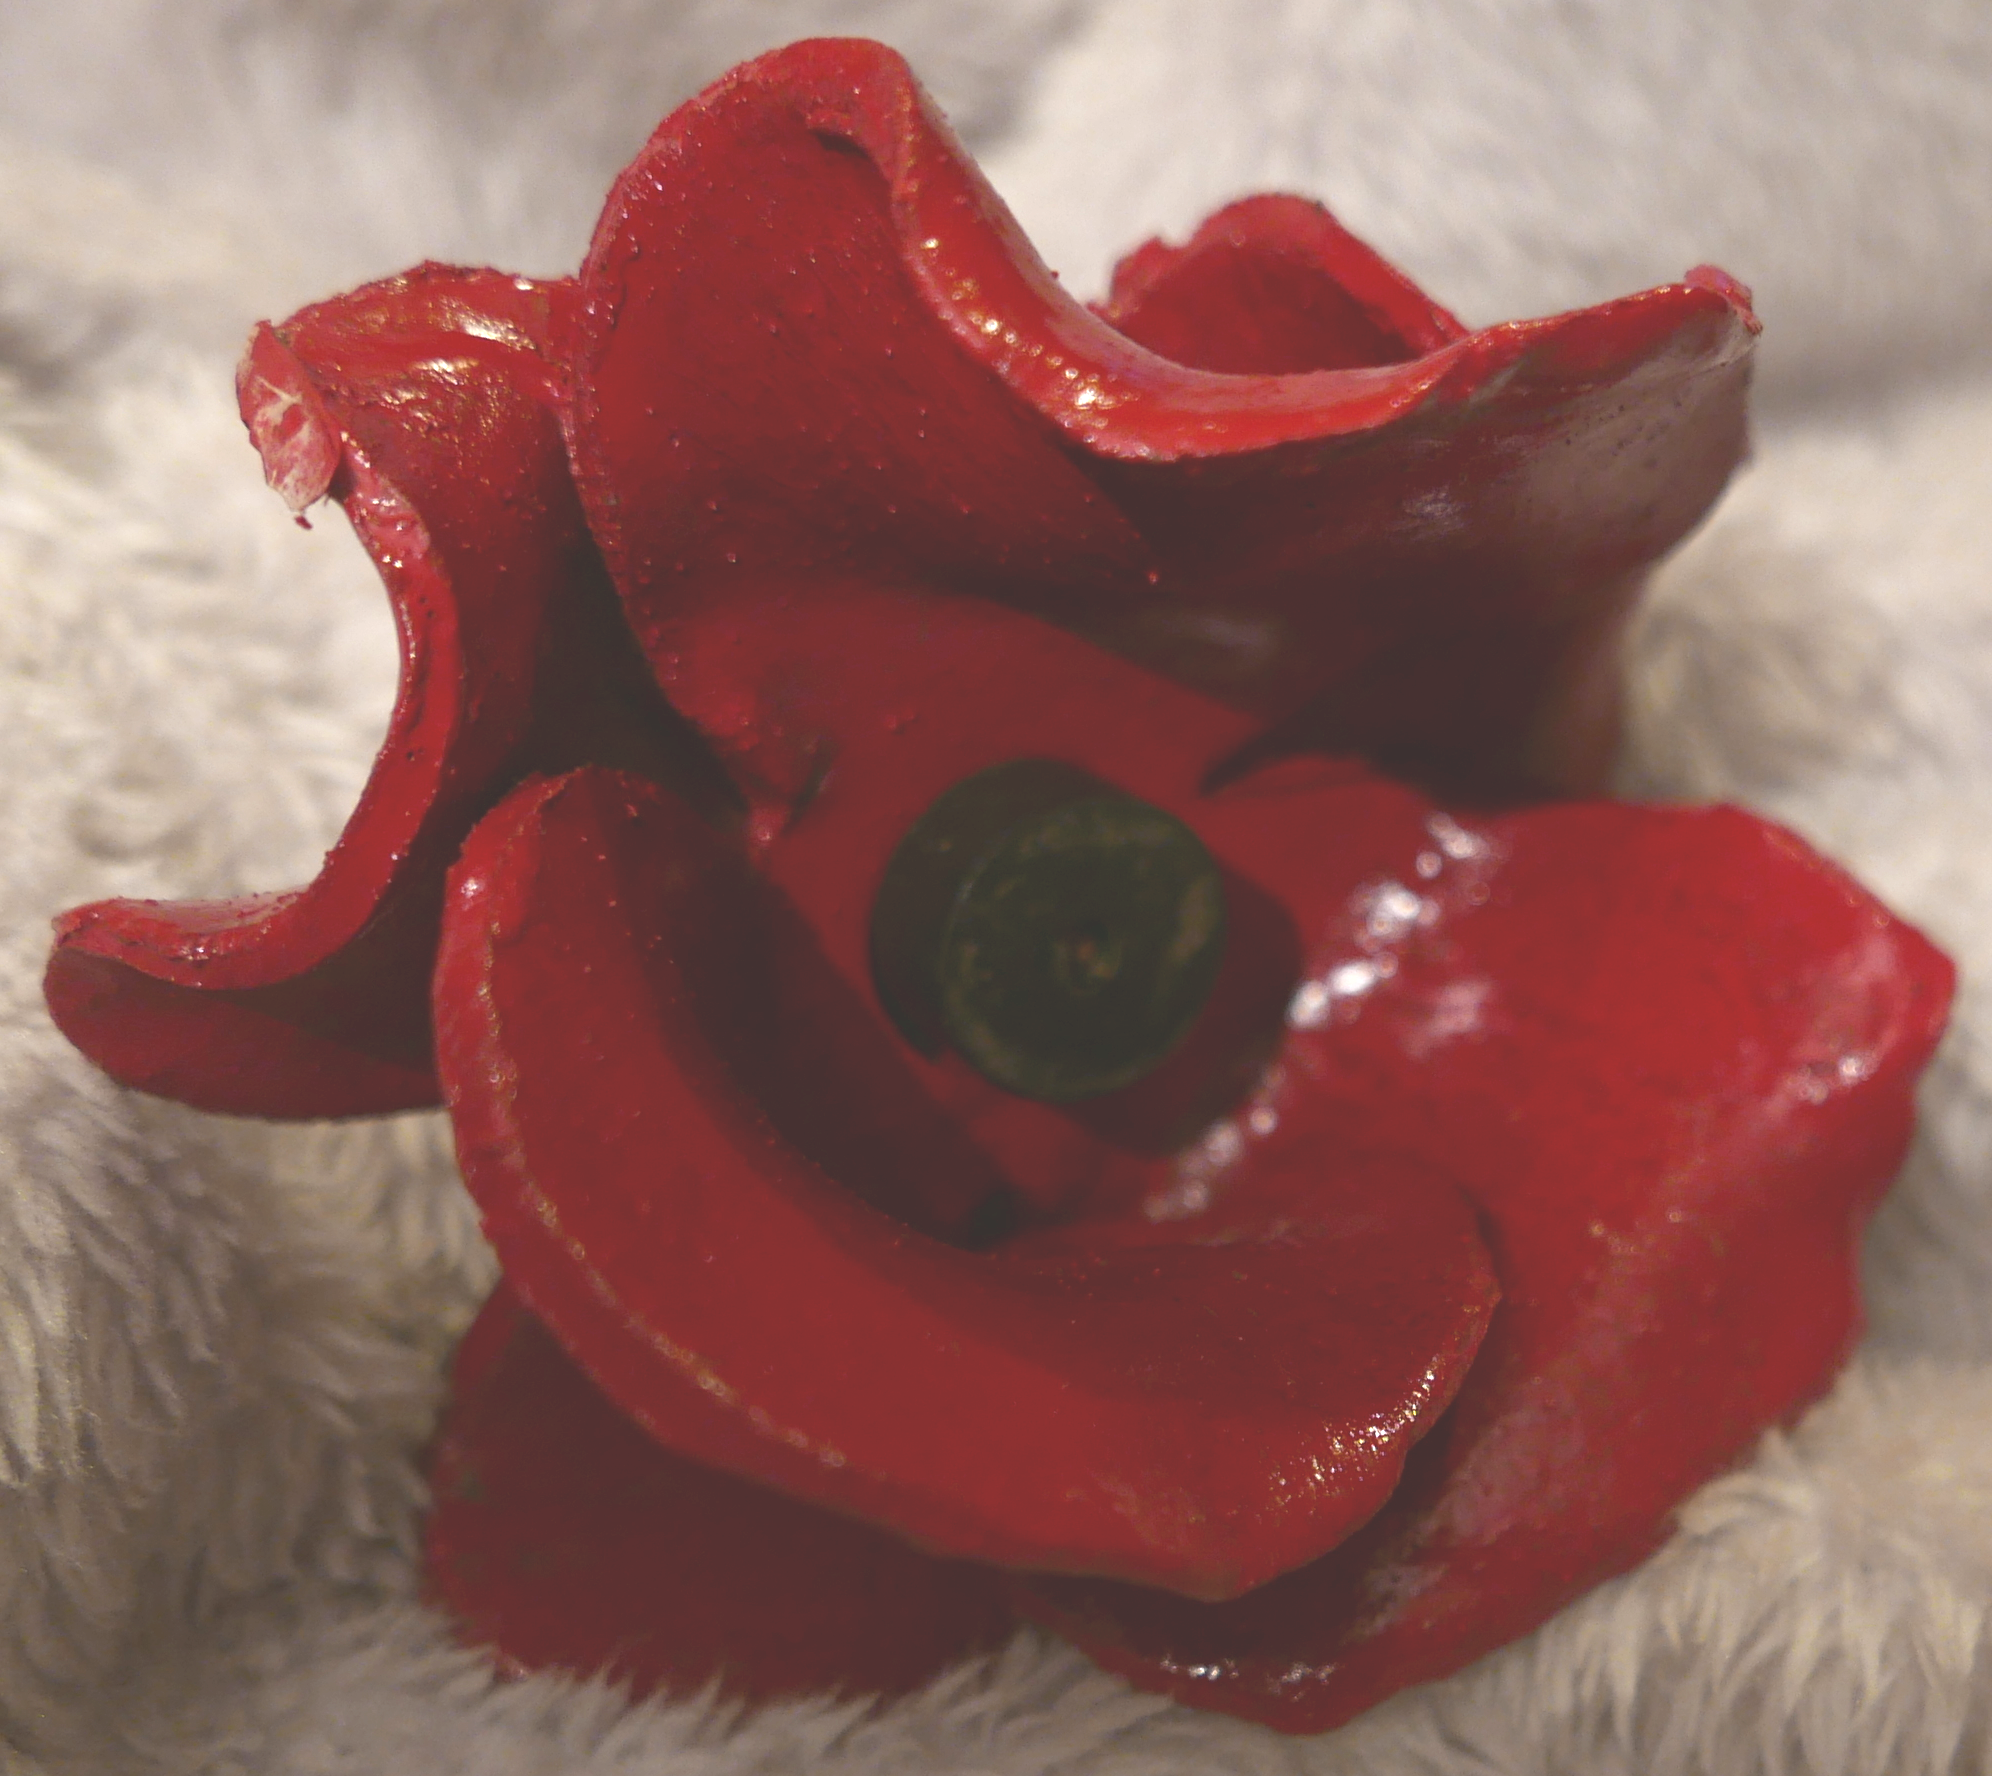
Poppy from the installation “Blood Swept Lands and Seas of Red” at the Tower of London
This post was first published 26 April 2018 and subject to minor revisions in November 2023

Hello,
My great uncle 36812 Pte Williams (Thomas Samuel) was fighting with the 26th Highland Bde (9th Scottish Division), on the 25th April 1918. He was located with 5th Camerons at St Eloi who had to withdraw back to the Cheapside line. Their delaying action ensured the reinforcements stopped the German advance in Flanders.
Your relative’s participation in the defence against the Germans attack known as the 2nd Battle of Kemmel and the British do a great account of themselves.
My Great uncle was with the Machine Gun Corps and reported missing 25th April 1918 at St Eloi….after further research found he was captured and died of wounds in Kortrijk.
“We will remember them”
Mike
Comment by michael garnett — 9 February, 2020 @ 3:52 pm